The never-ending chronicle of my new Saltwater Aquarium

Sunday, July 31, 2005

Like a kid in a candy store...

Well, now that I'm back from LBI I can resume my progress on my tank. A lot of stuff has happened tank-wise in the past day. I had ordered all of the electronic equipment that I needed while I was away so that it would arrive once I got back. Little did I know, Dr. Foster and Smith upgraded my shipping for free so that everything came on Saturday. I was surprised by that. I guess when you spend about $500 on aquarium supplies they do stuff like that ;)

I guess the next biggest thing that I got accomplished was that my Dad and I finished up the stand and brought it up to my room. We put the doors on the hinges and the doorknobs on. Speaking of doorknobs, I can now reveal what they look like:

Let there be light...houses!

Surprisingly, the doors went on without a hinge...I mean hitch...

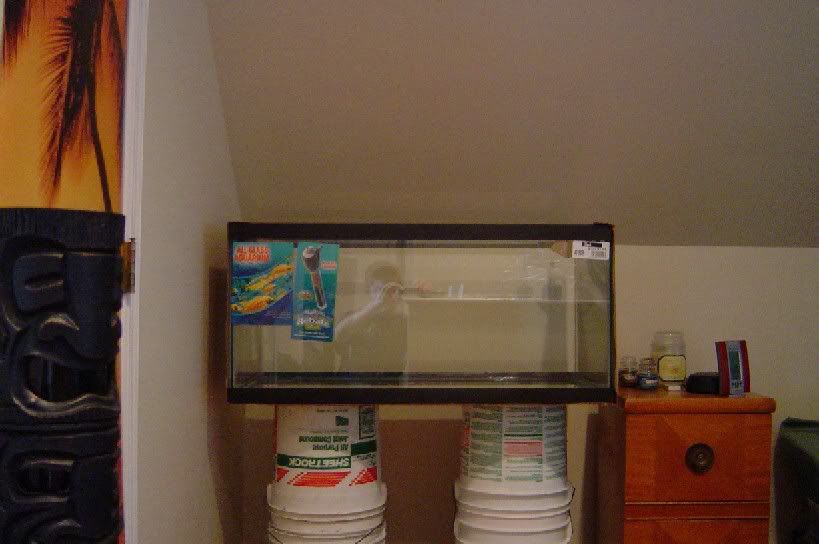
The tank looks really nice sitting on top of the stand. It fits very well with the rounded edge of the stand sticking out an even amount around the tank. Never before have I put something together and had it come out the way it was supposed to on the first try ;)

You can see that the tank fits just as it did before on top of the buckets!

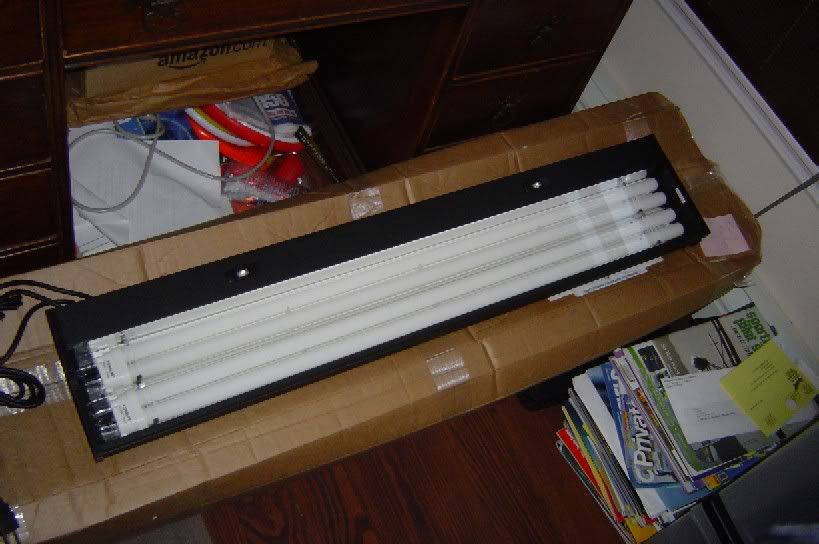
Another item that I put on yesterday was the compact fluorescent lighting system. This thing could probably light up a football stadium if you wanted to. It is powerful enough to simulate the light found in the shallow waters of a tropical coral reef.

4 fluorescent bulbs + 2 LEDs = One helluva cool light fixture
One of the coolest features of the lighting system is that it has 2 different types of daylight and a night lighting system as well. There are 2 10,000 K daylight bulbs and 2 Blue daylight bulbs that add some needed nutrients to the water. There are also 2 Blue LEDs that are used at night time to simulate what the reef would look like at night. It also brings out certain instincts in the fish so that they behave as they would in the wild.

10,000 K Daylight: The bright light

Blue Daylight: Very mellow...

Both at the same time: Very natural looking!

Blue LEDs: Psychedelic!

So that is my lighting situation, and that's all you are going to get for now. I've gotten a bit more accomplished today by test-fitting some of the other equipment I got, but I'm going to save that story for later. Again, I have to have something for you all to keep coming back to see ;) Until then...

~Paul Out

I'm Back!

I'm back from vacation and got a whole bunch of stuff to update...but that will have to wait till later this afternoon because I'm at work right now. Look forward to more later today!

Friday, July 22, 2005

I'm off...

Well, I thought I'd have time to update before I go away. Unfortunately things have been really crazy over the past couple days and I had to prioritize things. I promise that once I come back next week I'll have something to write here. Hopefully by that time I would have ordered everything I needed and can write about that. Until then...

~Paul Out

Wednesday, July 20, 2005

It's Alive! Well, not yet...

I think the biggest question I've been getting since I started this blog a couple days ago is "What are you going to keep in your tank?". So, today's post is going to cover that topic a little bit. The coolest thing about saltwater aquariums is that more than just the fish are alive. Everything from the sand to the rocks to, of course, the fish are alive and kicking in a typical tank. For starters in my tank I'm going to go with CaribSea's Arag-Alive Bahamas Oolite Live Sand. The sand is extremely fine and white. They call it "Live" because it actually comes packed in water with special bacteria living on each grain. These act as a sort of biological filter.

Ooh Ooh Ooh it's Oolite, ya know!

Like I said before, even the rocks are alive. Old style marine aquariums used to have dead (white) coral as their main staple in aquascaping. New aquariums now use Live Rock to do this. It not only looks cool, but also serves a huge filtration function. The rocks house all sorts of animals large and (mostly) small. After the rock is cured and has been in a tank for a while it will start to grow all sorts of coralline algae and will be teaming with life. There are even different types of rock that you can get which correspond with the location in which they were harvested. I'm kinda stuck as to exactly which kind I want to get. Amazingly the rock is probably the most expensive item that will be in the tank. Here are my options as found on www.liveaquaria.com, the premier online fish delivery service:

Fiji Live Rock: Porous, Purple, and Pink

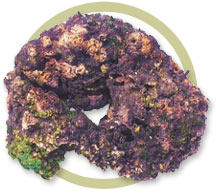
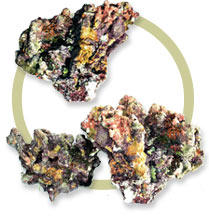
Lalo Live Rock: Multicolored Marine Mayhem!

There are a couple other types of Live Rock that aren't quite as nice looking or don't quite fit my needs. These are the two I'm kinda stuck between. I think I like the look of the Lalo Rock better. My main dilemma is that one "order" of Lalo Rock weighs about 30 pounds, but they say you should have 3/4 - 1 1/4 pounds of rock per gallon meaning that I should have 30-50 pounds of rock in my tank. I really don't want to skimp on it because it will be a big part of my filtration, but I don't want to get too much because it will take up precious space and it costs about $5 a pound including shipping. So, it's either $150 for 30 pounds, or $300 for 60 pounds...damn! Plus, the 60 pounds would be too much. The Fiji Rock is sold in 22 pound boxes. They have something weird going on with them due to a sale. For 22 pounds it is $110 shipped, but for 45 pounds it is $150 shipped. I'm so confused here. Maybe I can get by with only 30 pounds of Lalo Rock. If some expert is out there, please let me know!

Fully cured Lalo Rock...I want it now!

Now, all of those pretty colors you see on that rock are the healthy, coralline, algae. It takes about a month for a tank to stabilize and start becoming inhabitable for other fish. Sometime during this acclimation period it is likely that a "bad" algae outbreak can occur with some nasty brown and hairy algae. To combat this you have to add the algae "attack" creatures. They include:

Dwarf Red-Tipped Hermit Crab: An Algae Eating Machine
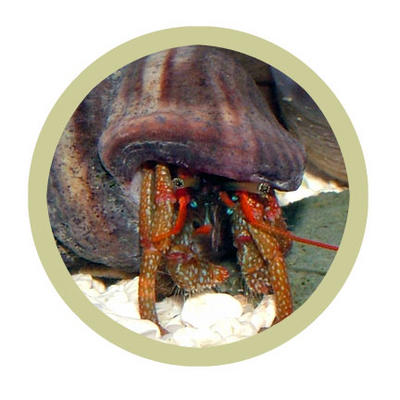
Dwarf Blue-Legged Hermit Crab: A Colorful Crab Concoction

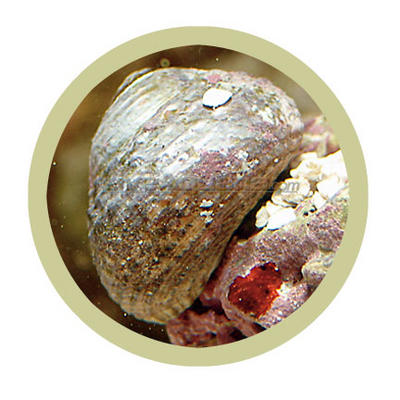
Margarita Snail: Goes well with salt...

So, these creatures will help eat all the unsightly algae the tank. They will be the first highly mobile animals that I'll probably see in my tank. I think today we'll stop there and leave the fish for a later time. I can't give away all of my secrets up front, you'd never come back otherwise ;).

On a side note, today I put the third and final coat of paint on the stand. I'm gonna let that dry very well before I start worrying about mounting the doors and moving it into my room. I don't want to smudge the paint or anything. The glass top for the tank also arrives tomorrow at House of Fins where I bought the tank originally. The store is really cool. You can check out their site here: www.houseoffins.com. I think you guys can expect one more update before I shove off on my vacation till August. If anyone has any comments, especially those Live Rock experts out there, please be sure to share them. Until then...

~Paul Out

Tuesday, July 19, 2005

2 Coats (and it is still summer time)

Today after work I stopped by the paint store to pick up some extra foam rollers and headed home for some more quality time spent with my stand. With dark clouds looming on the horizon I had to quickly get everything out to the garage before the skies opened up and it poured.

This picture was taken as the rumble of thunder could be heard

In order to put on a second coat of paint I had to first sand down any of the rough spots left behind while painting the first coat. Unfortunately this undoes some of the hard work I did the prior day and makes the stand look a lot less attractive:

Why must I destroy that which I create?

After a short interlude of depression suffered from looking at my now not-so-shiny aquarium stand I got to work. I never realized how easy putting on the second coat would be. Existing paint seems to be the best kind of surface for new paint to adhere to. Thanks to special guest photographer "Mom" I have some footage me actually painting:

and stroke...stroke...stroke...stroke...

I seem to have painted myself into a corner...

I've got probably one more coat of paint left to go. The inside of the stand is definitely done. I really don't need to waste paint on something I'll only see when I'm reaching for some fish food or adjusting the light fixture timer. I also ordered knobs for the doors that I think will look pretty cool. I'll show those off later. Currently this is what the stand looks like:

Oooooh, I can see my reflection...

I'm actually quite surprised as to how much reaction I've received from posting this. In the last 24 hours I've gotten over 65 unique visitors to this page. Feel free to pass this along to anyone else who you think would enjoy my progress. I know I'm missing some email addresses of a few of my friends and family. Things are only going to get more exciting as time goes on. A saltwater tank progresses very slowly, but the steps are fun enough to be worth reading about. Join us next time when we'll find out the answers to a few major questions: What sort of fish will we find swimming in my tank? How long till we actually see some life forms? And, will Jane really go to the dance with Joey? The answers to this, and more, next time. Until then...

~Paul Out

As the sun sets over the island, we wonder who will carry the torch on to the next round...

Monday, July 18, 2005

It starts...

So, before you can keep fish in a tank you need to actually buy the tank, figure out where to put it, and get a stand to hold it. For my aquarium I figured that I should get the biggest that my room would allow me to fit. With saltwater tanks it is always best to go bigger. That way if something weird happens it doesn't kill off the tank quickly. You don't want a fish to die and then give off harmful chemicals killing other fish and causing a chain reaction, etc. So, I went with a 40 gallon "breeder" tank. It is a shorter tank which will fit my sloped ceiling, but it also is a comfortable size to fit all sorts of fun fish.


Here is my 40 gallon tank

As you can see the tank fits nicely up against my walls and next to my end table. The top of the tank is just high enough for me to have access to it without hitting into the ceiling of my room. The next dilemma was where to get a tank stand from. My Dad and I figured that we needed to make the stand a little bit smaller than standard to comfortably fit my room, so we had to manufacture it ourselves.

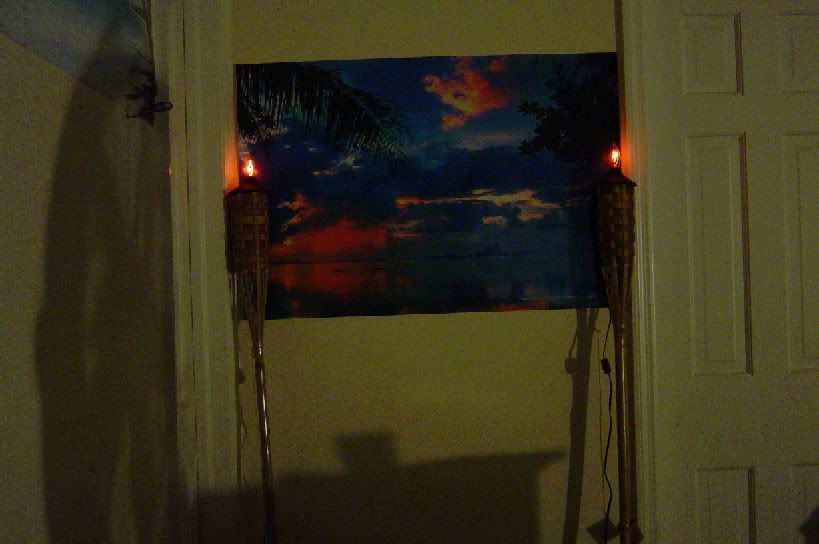
The Tiki heads say this is the right height for the tank

So creating a tank stand is a lot of work. First you have to figure out how to build it:

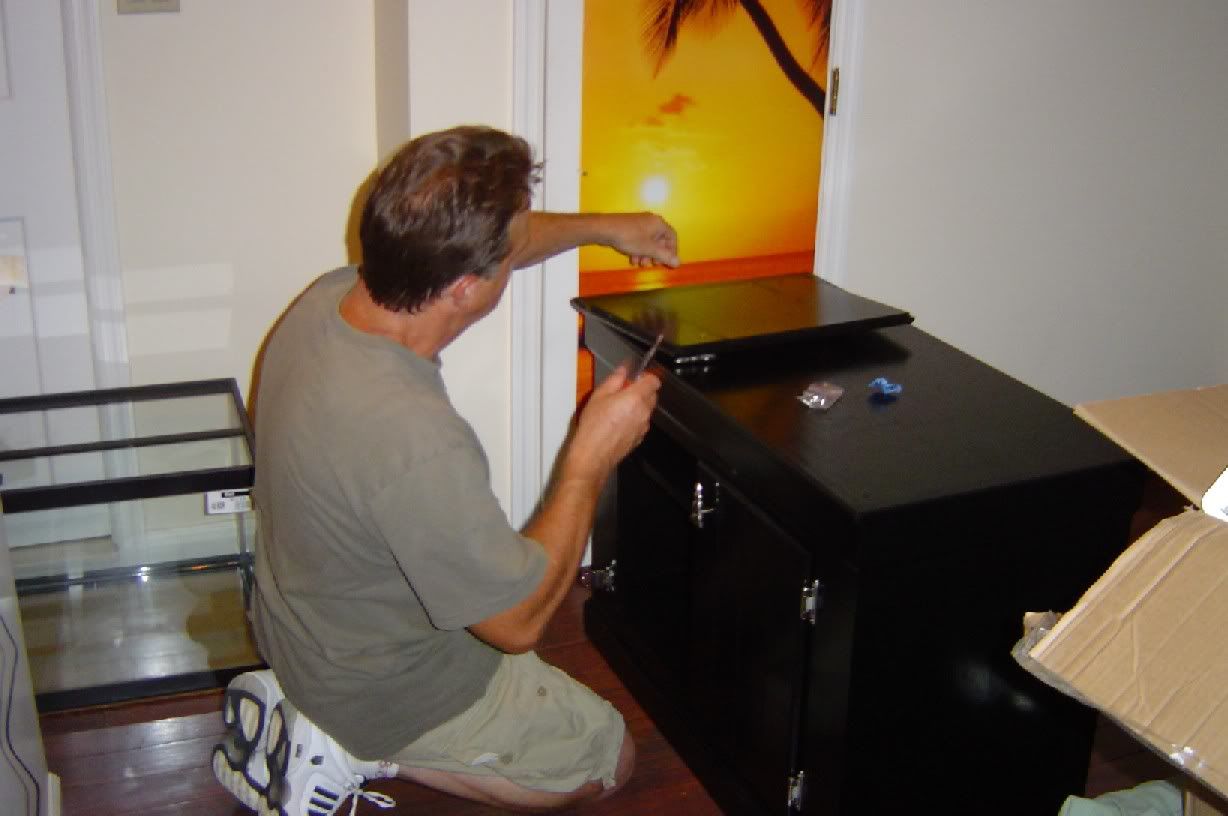
Master craftsman "Dad" contemplates the meaning of life...

Then you have to clean out the garage so that you have space to build it:

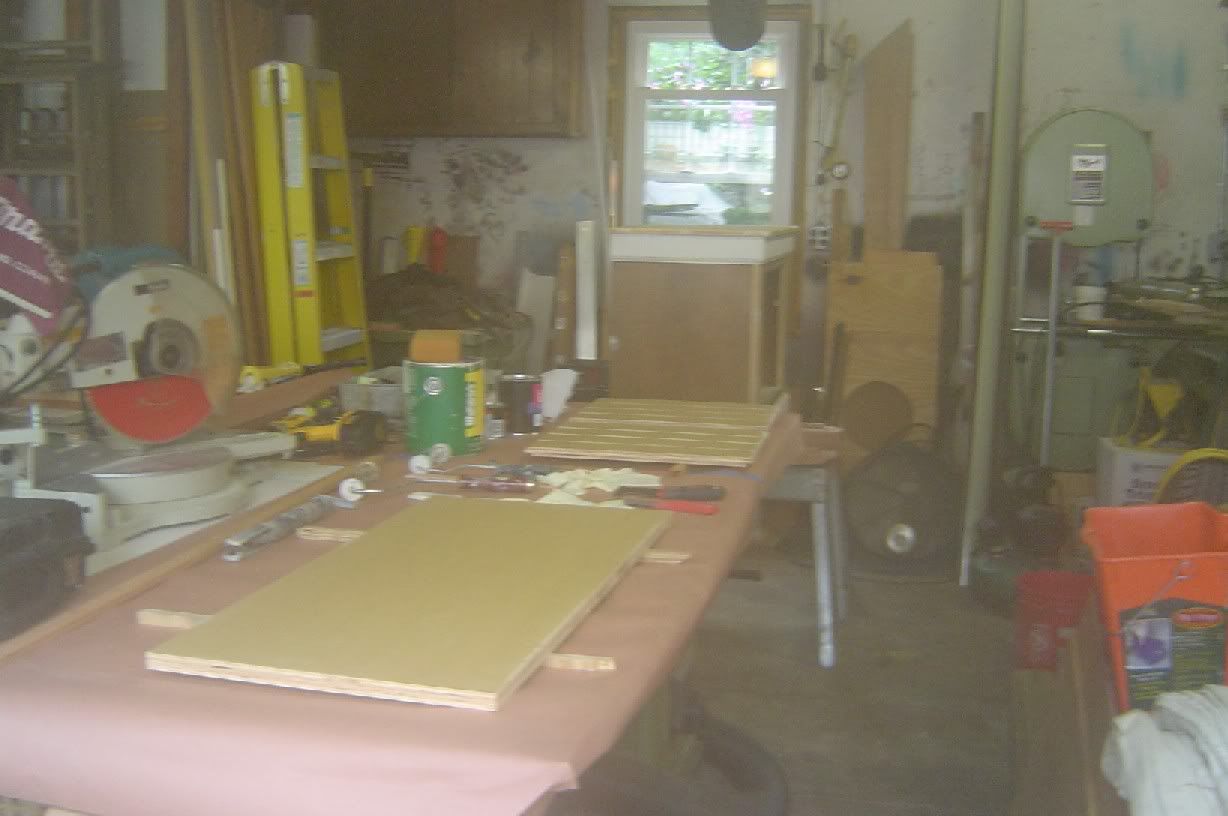
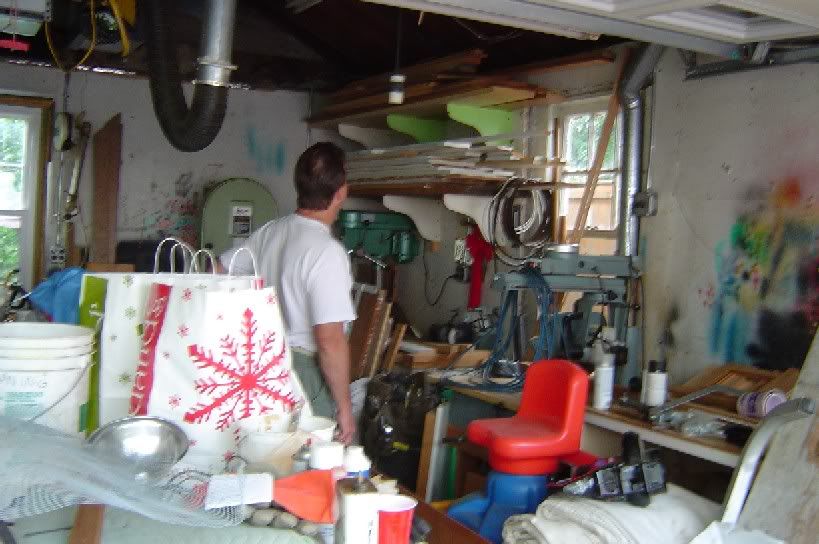
Where'd all this crap come from?

We'll put this over here...

Shhhh...we seem to have found the elusive littlus brotherus

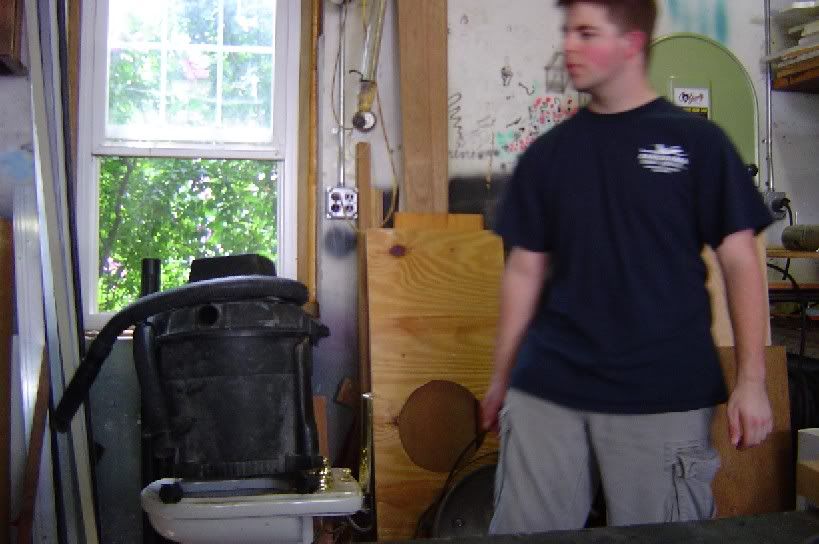
Hey, I've got to do something, right? On a side note, is that a bidet?

So after cleaning the garage out so that we can actually move around in there we set off for the lumber yard. My Dad and I figured that we'd need a sheet of plywood along with whatever scrap wood he had laying around to complete the whole project. It took about 2 days worth of cutting, gluing, nailing and screwing to get to a point where it actually looked like something:

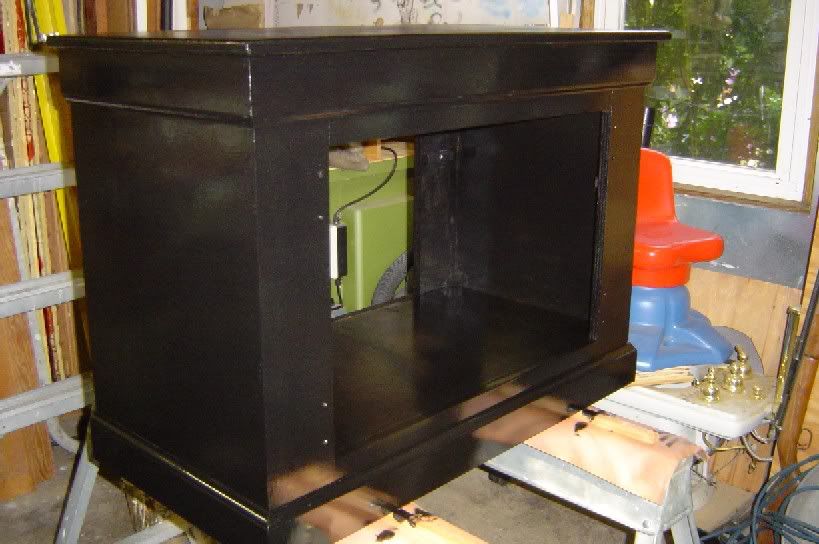
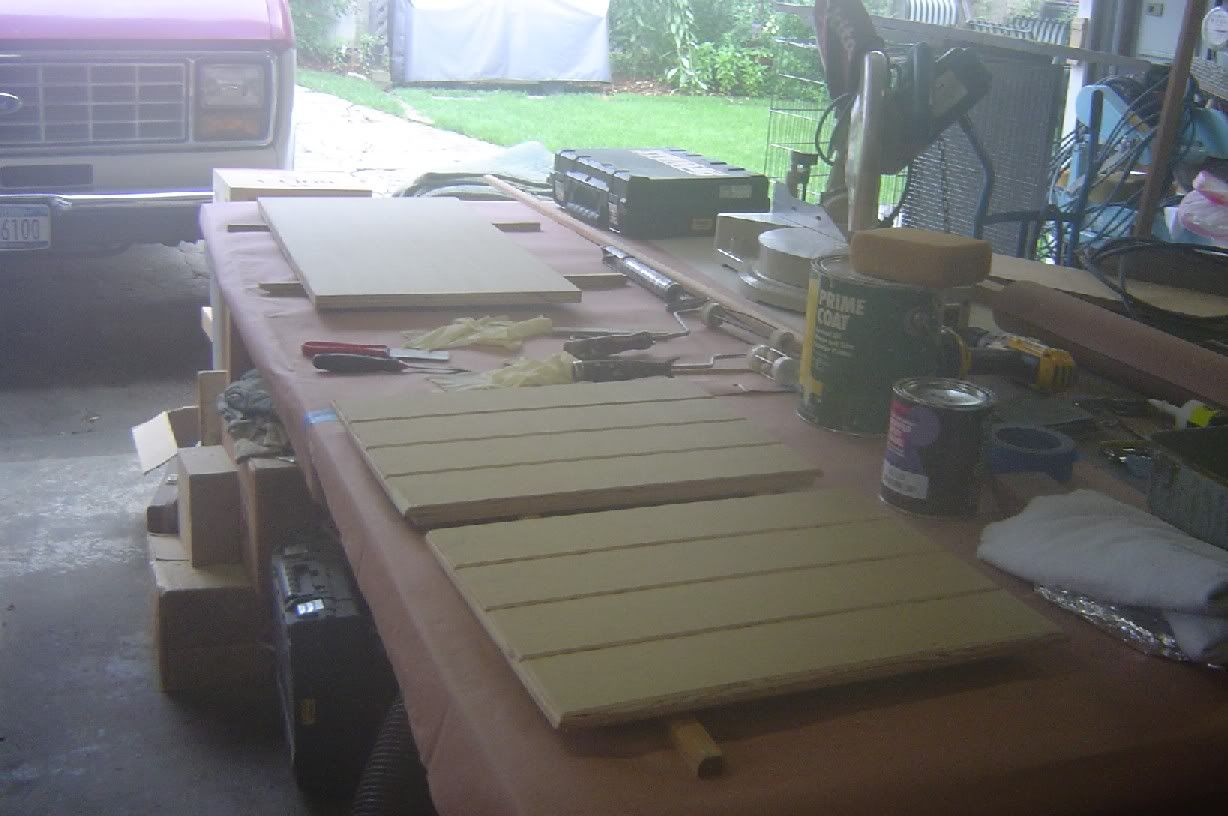
Doors and a shelf. I really like the grooved texture we gave the doors.


This is the stand from the front. It is open in the back to allow for wires to go inside.

This is a real solid piece of furniture.

So there is only one more thing left to do to the stand...paint it! I decided that I wanted to paint it black to match the rest of the tank and its eventual accessories. We went with a high-gloss indoor/outdoor enamel. Damn does that stuff get messy. I'm going to have black paint on my hands and elbows for a long time...


This is before...

...and this is after.

This is a little bit closer. Notice how shiny it is :)

This is only after 1 coat of paint. I'm going to give it at least one more.

So this is as far as I've gotten with my project up until now. I'm sure for some of you this is the boring part, but it has to be done. I enjoy the woodworking and painting a lot, though. It reminds me of all the fun summers I spent with my Dad helping him with his contracting. It also brings back memories of building stuff with my TEKE buddies. Though, most of that stuff tended to fall apart ;). I guess I've always just been around tools of the trade and I enjoy that every now and then.

I've got at least one more coat of paint to add to the stand before I can bring it inside and set the tank on top of it. There is so much more left to do. Unfortunately for all of you guys out there in TV land I'm going away until August shortly, so I won't be able to really start the "biological" part of this tank until then. At that time I'll go into details on the lighting, filtration, and substrate. Until then...

~Paul Out

Welcome!

Welcome to my new blog!

I intend to use this space to follow the progress of my new saltwater aquarium. Ever since I was a young child I wanted to create my own marine aquarium, but never had the patience, time, or money. Now that I'm working at a better job with a higher income I can finally accomplish that goal. What is to follow will be my chronicle of this adventure...